Showing posts with label punch. Show all posts

Thursday, 16 July 2015

Primary Colours

Over on MFT Stamps Summer School is in and yesterday's lesson was 'Primary Colours'; red, blue and yellow.  So to reflect I was listening to my teacher I made this last night but waited until today to photograph in good daylight.


I used Distress Inks, Salty Ocean, Festive Berries and Squeezed Lemonade, stamped Elegant Butterflies in Black Archival ink then punch them out with my Elegant and Bitty butterfly punches from Stampin'  Up!

To head over to the MFT blog and check out their SummerSchool just click  here

See you tomorrow, take care of you.

Pauline x


Friday, 3 July 2015

Butterfly Delights Cards

For today's post I have taken inspiration from Keisha Campbell on Pinteret who I greatly admire.  Her work I find romantic, creative and completely up to date with respect to card making.

Here are my takes on her card.


Here I used retired DSP and Basic Gray card, which I embossed using my Big Shot.  


For the butterfly I first die cut this using the Sizzix Basic Shapes die in pearlised thick cream card and then a layer of velum.  I then added a medium sized rhinestone from Stampin' Up!


I used white ribbon tied together in the middle with some white cotton thread and the adhered using Crystal Effects.  The hexagons were punched using a punch from SU and the large octagon was made using my Sizzix Eclipse machine and are 3".

All the DSP has since retired from SU.  I really need to buy new paper.  I chose to leave the cards all without any specific sentiment so they can be used for any occasion.

I hope today has brought you giggles and smiles.  Take care of you.

Pauline x


Sunday, 31 May 2015

Stampin' Up! Treat Box

Happy Sunday everyone.

Last week at work was pretty tough for my colleagues and I so to bring a little happiness into work I made treats for them.


These are 3 1/2" x 2" treat boxes using some retired Designer Series Paper, co-ordinating cardstock and of course treats.


I also used butterfly punch and stamps, Papillion Potpourri and Fabulous Phrases,  Bermuda Bay ribbon and Coastal Cabana ink.

So I hope my colleagues enjoy their treats.  Hope your weekend has been  kind to you.  Take care of you.

Pauline x


Tuesday, 7 April 2015

Websters Pages Planner

Wow a whole month plus more has gone by. How did that happen?

Lots has been happening since I last wrote. I haven't completed my essay as my pc is broken and being repaired as we speak, I hope!

This week I am off work and have been busy playing with and decorating my new Websters Pages colour crush personal planner. Here are so photos. 


I started making these embellishments before the planner arrived. I used Heidi Swspp Minc and embellishments with Stampin' Up' glitter paper and punches too. 


I took out Jan, Feb & March and started decorating from April. I have done 6 months so far. 


I then went on to make more embellishments. Clips for the inside and charms for the outside. 


Here I used Stampin' Up! glitter paper and the Bow Builder punch. 


I also made this tassel. Utterly ridiculous but cute and tassels are everywhere this year. 

Take care of you and happy crafting. 

Pauline x


Saturday, 14 February 2015

Easter Baskets Stampin' Up! Style

Happy Valentine's Day everyone.  Hope you all relieved something special.

Despite it being Valentine's Day I have been busy making Easter baskets for my friend to give to her two favourite peeps.


I used the basket die from Stampin' Up! and stamped and cut out these lambs from the Storybook Friends set.  I then used my Sizzix EClips machine to cut out the bunny, carrots and words 'Egg Hunt'.  I then used my SU Stampin' Write markers to colour the nose, feet and heart on the bunny and then the carrot too.


The grass was cut using the EClips and the flowers using SU punches then I added black gems to the centres to create depth and dimension.  I also added the pompom trim in coral.  The butterflies were stamped and punched out then adhered to some clear plastic so it looks like they are hovering over the basket.  

Inside you will see a mini card I made so my friend can write a few words of love.


I used the Bow Builder punch to make the tag and the card in front is from my Project Life stash.  I used my Cinch to punch the holes then snipped the top to create a notepaper effect.


Inside is a mini card.  The gem inside the flower is from my huge stash of crafty things lol.

Here is the basket for the wee guy in her life.


I stamped my card with the stamp first to creat a wood effect before running it through my Sizzix BigShot to make the basket.  The eggs have been cut out using the EClips.


I used a mini brad to attach this handle and added a co-ordinating Cany Dot for effect.  I used my EClips to cut out mini eggs for the handle.  I love the dimension of the bunny, so cute.


Here is the envelope holder for this basket.


And the mini card inside.

So much fun.  Inside the basket are a few non edible treats right now but I will be adding a few chocolate ones before I give them to my friend.  I hope you all have a great weekend.  Take care of you.

Pauline x


Thursday, 8 January 2015

'Just One' Stamp Set Challenge - Day 3

Hi all, how are you all enjoying the start of Sale-A-Bration?  I hope you are finding lots and lots of inspiration out there and considering what wonderful products Stampin' Up! bring us all.

Ok.  It's day 3 of my 'just one' stamp set challenge. If you would like to view Day 1 & 2 keep scrolling down after this page to find them. 

So without further delay here is today's challenge. 


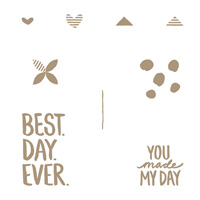
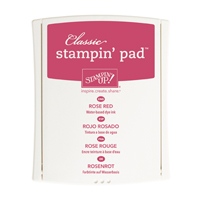
So much fun!  I used straws to be the mast and banner holders. I used the 'Banner' punch and matching stamp set then using glue dots made a banner, pink got the girls and blue for the boys.   I then used the dots stamp stamping onto Whisper White card stock and then in s coordinating ink I stamped 'You Made My Day' from the 'Best Day Ever' stamp set. After punching a hole top and bottom I made it into a sail. I finished it off with more stamped and punched banners to create the flag aloft the mast. So much fun and my son thought having a choc muffin with embellishments was so much fun. 

How much fun would these be for either a treat or decorating for a party theme?

Well I hope you have enjoyed today's challenge and I hope to see you all again for tomorrow's. 

Have a wonderful day. Take care of you. 

Pauline x

Table built using Product Table Builder by The Crafty Owl - Independent Stampin' Up! Demonstrator.

Friday, 2 January 2015

Project Life 2015 Album

In 2015 I am going to try harder to complete a monthly page or spread. I would love to say I will do a daily log but I know this will never be practical for me. Project Life makes keeping the memories in a simple and quick format so why complicate life and set goals that will be unachievable?


I purchased this album a while ago as I love turquoise and I couldn't buy one from Stampin' Up! in this colour.  However, I have used SU products throughout and also some Becky Higgins filler cards too.

Although it will be a 2015 album I wanted to save my Christmas memories so I started early. 


This is the front page.  I have used Cherry Cobbler card stock from SU and a gold pen for writing.  I also used my crop-a-dile and the Itty Bitty circle punch to make some glitter reinforce rings, which adds sparkle as well as being practical.


I used the Becky Higgins app to create these photo layouts but also SU scrapbooking products to embellish all the pages.


 In the picture above I also used the hashtag stamps from Tim Holtz.


Then I started my 2015 album. 


In the picture above, the sentiment is from my stash and there is also a metal tag from Tim Holtz.  The 2015 is from the embellishment kit from SU Everyday Adventure PL set.


I made thie coin envelope myself and embellished it with PL stamp sets from SU.


Stampin' Up! have gorgeous Project Life sets, which I will be purchasing this year very soon. I love how their products all match and are so versatile. I have use my heart punch, banner punch, stamp sets and my most favourites their gold and gold glitter papers, they are amazing.

I also used the Becky Higgins app, which you can purchase using an iphone or iPad and then also purchase PL sets, which are great for collage printing and then simply slip them into your PL page pockets.  Simplicity at it's best. 

I printed my photos off using the Canon Selphy, which using the Becky Higgins app is easy, simply and an easy way to make instant collage sets.

If you are interested in Project Life or any of Stampin' Up! products either leave a message here on my blog, visit my Facebook site, Pollycraft or my Stampin' Up! site 

Many thanks. Take care of you. 

Pauline x


Saturday, 16 August 2014

Midnight Muse and Silver

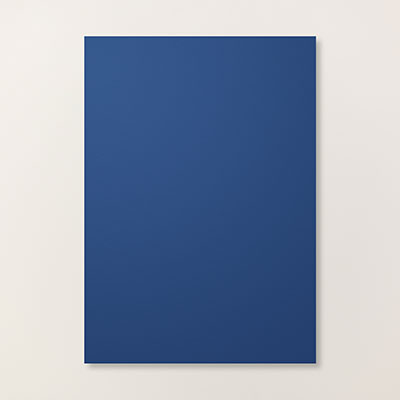
Today's cards I used Midnight Muse cardstock and ink, silver glimmer paper, a heart punch and white embossing powder to create these cards.  The stamp is from Express Yourself, one card has been stamped with Midnight Muse ink and the other heat embossed with white embossing powder.  The white card has been layered between the white card and blue card layer with stamping dimensionals and the on the blue card all the hexagons have been layered using the dimensionals.  All the hearts have been popped up with itty bitty dimensionals.  The envelopes have a midnight muse designer series paper liner inserted, which has been die cut from the envelope liner die.

I am loving this blue with silver it is sleek and spectacular.


All these goodies are from Stampin' Up! and can purchased from my online shop, just click on a tap at the top of the page.  Hope you love them as much as I do. 

Take care of you x

Pauline
Table built using Product Table Builder by The Crafty Owl - Independent Stampin' Up! Demonstrator.