Sunday, 25 January 2015

Gold Foiling Using The New Heidi Swapp Minc

Sunday afternoon's are all about crafting for me and I'm sure many of you also.  I am so in love with the new Heidi Swapp Minc I cannot tell you and today I have been making some cards.  


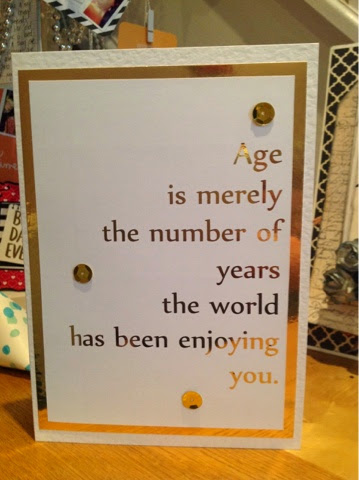
I have used a few different font styles and sizes in all the cards.


The cards are all A5 and made using 300gsm hammered cardstock, gold mirror card and sequin.


I have purchased some new fonts online particularly for creating variety.


These last two cards I think apply to many of us ladies in our 40's and beyond lol.

I love making cards and I hope the people in my life who will receive these will love them as much as I do.

Hope you are all having a carefree and relaxing weekend.  Take care of you.

Pauline x


Sunday, 18 January 2015

Project Life 2015 Album

This week you will know if you follow my blog regularly that I have a new addition to my family.  I say this because the new Heidi Swapp Minc will be so loved this year and forever more it will feel like a member of my family lol.

Ok, here are this weeks pages.


I just had to have a photograph of this glassine gift bag that I made to send the cards I have made to a very kind friend.  I love it I want to keep it but I know giving is what I do best and I just wish that I could see her face when she opens her parcel, it will be a picture for sure.


I took some 2x2 photographs using the Canon Selphy but it chopped the top and bottom off the cards, but that's ok I know what they look like and the album is about creating and recording my memories so not a biggy.  

I also made a velum bag, not a glassine one, but loved the hearts.  The velum is from Stampin' Up!


This is the page with the bag folded over.  I love the frames I have made.  I have had these Ikea Ribba frames sitting in the house for about a year, the hoarder in me knew one day they would be useful lol.


This is the double spread.  

Well I have had a wonderful weekend crafting.  I hope your weekends have been equally full of fun.

Take care of you.

Pauline x


Handmade Glassine Gift Bag

Happy Sunday.  Today as always is all about gold and having fun creating and giving. 

On Friday I made some gold cards with my new Heidi Swapp Minc so today is all about gift wrapping them. 


I made the bag from a large sheet of glassine paper, yep you know I'm a hoarder and the stuff I have is pretty refi cultus hahaha. I wrapped the bag using Stampin' Up! Designer Series Paper in black, added a doily and some paper flowers that I went round the edges with gold glitter and punched out a gold flower using the Blossom and Pansy punches and Gold Paper, all from Stampin' Up!  


I took a journaling card from the Love Story Project Life collection then stamped the sentiment onto it. The sentiment is from the new Spring/Summer catalogue and it's called Hello Life.  I added some sequin to add some sparkle. 


I also added a gold peg that I had attached a small charm and a dangle I made using gold, pearl and faux crystal beads onto a gold jewellery pin. It's this added dimension that truly makes a present even more extra special don't you think?


Then I wrapped it all up in black and white twine and it's all ready now to be mailed. 

I hope you are enjoying my gold themed projects. It's lovely to hear feedback so please leave a comment down below.  

Hope you are all having a wonderful weekend. Take care of you. 

Pauline x


Saturday, 17 January 2015

More Home Decor With The Heidi Swapp Minc

I just haven't been able to stop playing with the new Heidi Swapp Minc. I have become obsessed with foiling. What a wonderful and satisfying feeling make these beautiful projects. 


I used a black Ribba frame from Ikea here and used the 'Hot Pink' foil on Whisper White card and layered over gold heart velum from Stampin' Up!


Next I used a White Ribba frame and using the Gold foil I layered this over Stampin' Up! Gold Paper and added some gold sequin. 

To achieve the notebook affect I used my Cinch to punch the holes then using scissors chopped small fractions from the centre.   This has been raised onto Dimensionals also from Stampin' Up!

I love the finished look.  Absolutely loving the effect I am achieving from the Minc. Simply special. 

Take care of you. 

Pauline x


How To Use The New Heidi Swapp Minc For Home Decor

Heidi Swapp's new Minc (Metalic Incorporated) is an amazing way to bring new designs to your home in an affordable way. 


I have taken a white Ribba frame (11 1/2"X11 1/2") from Ikea and used a 12"x12" background from the Teresa Collins 'Urban Market' collection adhering this around the opening. 

I then used a Tim Holtz ring binder and centred this above the opening and used the supplied closures to secure it. 

I had a saying I took from 'The Strategy Lab' that I had foiled in gold using the new Heidi Swapp Minc and also some Glimmer Paper from Stampin' Up! I then punched and hung them onto the binders. 


I love it. I will likely make further sayings for this and change them up from time to time. Also with the neutral backgrounds other foil colours can be used, Heidi Swapp has 10 foils; gold, silver, holographic, red, green, hot pink, light pink, rose gold, teal, and blue. Plenty of opportunities to find a stunning colour just for your home. 

Take care of you.

Pauline x


Friday, 16 January 2015

Heidi Swapp's New Minc

Yesterday I took possession of what will undoubtedly be my new obsession; the Heidi Swapp Minc foiling machine. I cannot say how gorgeous and amazing the products you will all be making soon. I honestly feel this machine will be 2015's must have and being one of the first to own one in the UK feels pretty darn special. 

Here is what I have been making. 


The base card and gold card is from my stash the top is coastal cabana from Stampin' Up! as is the sequin. 


I have used Whisper White from Stampin' Up! for the top card here and my hammered card for the base card. 


In real life these are beyond phenomenal. 

Hope you all have s wonderful weekend. I know what I will be doing more of!

Take care of you. 

Pauline x


Sunday, 11 January 2015

Project Life 2015 Album

Today I have completed a double page in my 2015 album. I have been thinking a lot about life and what motivates and inspires me and the pages reflect this.


This page has a Becky Higgins quote from one of her collections, the notepaper I cut out using my Sizzix Eclips machine from a stack from DCWV. The tag is from my stash and I have written a motivational inscription on it.  The top right is from Love Story from Stampin' Up! and this has a 2x2 photo adhered and the bottom left I used some Tim Holtz words that also remind me of a perspective I am always trying to achieve in life. 


Again I have an inspirational quote, which is a 4x4 photo and above is a 4x4 card from the Everyday Adventure Project Life set from Stampin' Up!  I have adhered some wooden alphas to compliment the photo, which has the sea and 'wander' written. It reminds me of my life before children and sometimes I miss that spontaneous lifestyle and freedom that came with this (just sometimes). 


Here are the pages side by side. 

I hope you are having a wonderful weekend and maybe even full of adventure, passion and lots of pictures too. Take care of you. 

Pauline x


Day 7 Of My 'Just One' Stamp Set Challenge

Welcome all to Day 7 of my 'just one' stamp set challenge where I have been using 'just one' stamp set, as the name suggests lol, to create a different project every day.   I have challenged myself with this in celebration of Stampin' Up!'s annual Sale-A-Bration, which runs from 6th January through to 31st March. Incase you haven't heard for every £45 you spend on goods of your own choice you can pick either a stamp set, paper or wonderful projects FOR FREE. Also if you sign up to become a demonstrator you will receive £130 worth of goods OF YOUR CHOICE for only £99 PLUS the pick of TWO FREE kits of your own choice. This opportunity only runs during SAB so why not click on the tabs above, check out the products and open up a whole new world of crafting to you using these top quality amazing products. 

Ok, back to my final day of this challenge and one of my favourites. 


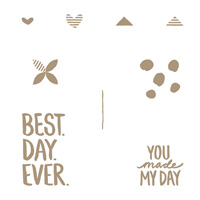
I have made a photo frame using Designer Series Paper from the Spring/summer catalogue and black card.  Then I used Versamark and gold embossing powder with the 'Best Day Ever' stamp raised on foam dots to create layering and texture. The frame and mini note paper I cut out using my Sizzix Eclips machine. 


Here is a picture of the background adhered to a cut piece of poster board slightly shorter than the dimensions of the frame. 


Here is a picture of it now adhered to the frame. I adhered all the sides but you can chose to only adhere 3 sides leaving the top unglued to enable a photo to be placed in behind. 


This is a side view. I made a paper hinge and adhered this to a long thin piece of poster board to create the stand. I then used a piece of gold ribbon and adhered to the back of both the frame and stand using a glue dot. 


Here is a picture of the front before its all adhered. 


This is a much larger frame I have made. Here I only glued 3 sides leaving the top open and this allows you to change out the background.   I have used one of the filler cards from the Love Story Project Life set from Stampin' Up!


Here are the two frames together.  I love how these have turned out. Simple but elegant and a wonderful way to bring inexpensive home decor to any room in your home. 


'Just One' Stamp Set Challenge - Day 6

Welcome all to today's 'just one' stamp set challenge.  It has been such a fun week celebrating Sale-A-Bration with you all and checking out all the wonderful products and projects online.  So inspiring and motivational.  

Today I have made something for the kiddies, or for parties for adults as the goodies inside can certainly be changed about to accommodate any age or gender.  

So without further adieu.....


These fun treat boxes have been stamped using the dots from the stamp set in two coordinating colours.  I have used Tempting Turquoise and Soft Sky and then stamped randomly around the paper until you have the effect you require.


I then stamped in Tempting Turquoise and Soft Sky ink I used the speech bubble from the Word Bubbles framelits set and my Big Shot machine I die cut out and using string which I have from last years SAB I punched a small hole in the seam of the treat pocket and tied on the sentiment.

So much fun.  Well I have now completed 6 projects using 'just one' stamp set and I am wondering how many more I will be able to bring you.  I know tomorrow's is going to be a cracker so I hope you pop by and see what I have made.  

If you wish to join Stampin' Up! and become a demonstrator I hope you consider me as a suitable mentor and I would love to have you as part of my team.  If not and you would simply love to purchase top quality products simply click on the pictures of products below or on the tabs at the top of my blog page.  Thank you so much for dropping by.  Take care of you.

Pauline x 

Table built using Product Table Builder by The Crafty Owl - Independent Stampin' Up! Demonstrator.

Saturday, 10 January 2015

'Just One' Stamp Set Challenge, Day 5.

Hello again. Hope you are having a wonderful weekend. How excited are we all about Stampin' Up's Sale-A-Bration.  There are so many amazing products and projects being made it is so wonderful.

Well today is Day 5!  How did that happen, but crazy happy its now the weekend.  Today's project I have used some 12x12 Designer Series Paper, in black and created this fantastic......


gift bag. 

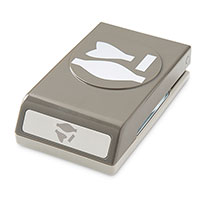
I think this is super cute.  I have used the Bow Builder Punch to create a bow for the top of the banner that has the 'Best Day Ever' stamped with Versamark and then heat embossed with Gold Emboss Powder.  The bow is a bit difficult to see on the picture above but better seen on the one below.


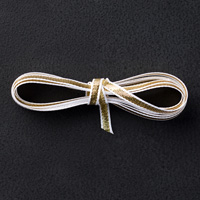
 I have used the Gold Glimmer paper, the Gold Foil paper and the Gold ribbon.  Do you think I'm developing an obsession with gold?  Gold is just so versatile, happy and helps create a project that is just that extra special.

All of these products can be purchased from me using the tab at the top of the page which will take you directly to the Stampin' Up! shop or simply click on the pictures below of the item you are wishing and it will take you directly to the shop.

I hope you are enjoying my projects as much as I have enjoyed making them for you.  Have a wonderful weekend and I will see you all tomorrow.  Take care of you.

Pauline x
Table built using Product Table Builder by The Crafty Owl - Independent Stampin' Up! Demonstrator.